Welcome to Minecraft! This guide is designed for absolute beginners to help you create your very first world and take those crucial initial steps into this amazing blocky universe. Let’s get started!
1. Introduction: What is a Minecraft World?
Think of a Minecraft “world” as your own personal universe within the game. Each world you create is a unique, sprawling landscape made entirely of blocks. It’s filled with different environments (like forests, deserts, oceans), resources (wood, stone, ores), creatures (animals and monsters), and structures (like villages or temples). This world is yours to explore, change, build in, and survive within. It’s a sandbox where you set your own goals!
2. Getting Started: Accessing the ‘Create New World’ Menu
When you first launch Minecraft and arrive at the main menu:
- Look for a button that says “Play” or “Singleplayer”. Click it.
- On the next screen, you’ll likely see options to play existing worlds (if you had any) and a prominent button labeled “Create New World”. Click this button.
(Note: The exact appearance of menus might differ slightly between Minecraft Java Edition (PC) and Bedrock Edition (PC, Consoles, Mobile), but the “Create New World” option will be there!)
3. Choosing Your Playstyle: Game Modes Explained
Before your world is made, you need to choose how you want to play. This is set by the Game Mode.
| Game Mode | Description | Recommended For |
|---|---|---|
| Survival | The standard way to play. You must gather resources, craft items, build shelter, manage health and hunger, and defend against monsters. | Most new players. The intended core experience. |
| Creative | Focus purely on building and exploring. You have unlimited resources, can fly, cannot die, and can break blocks instantly. | Players who just want to build without limits. |
| Hardcore | (Primarily Java Edition) Like Survival, but locked to the hardest difficulty, and if you die once, your world is permanently gone (or locked to spectator mode). | Experienced players looking for a major challenge. |
Recommendation for Beginners: Start with Survival Mode to learn the core mechanics of the game.
4. Setting the Challenge: Understanding Difficulty Levels
Difficulty affects how challenging Survival Mode will be, mostly related to monsters (Hostile Mobs).
| Difficulty | Hostile Mobs? | Health Regen? | Hunger Effects? | Mob Damage | Recommended For |
|---|---|---|---|---|---|
| Peaceful | No | Yes (fast) | Hunger bar doesn’t deplete | None | Very young players or those who want zero combat |
| Easy | Yes | Yes (slowly, if hunger is high) | Hunger depletes, low health stops regen | Low | Good starting point for beginners. |
| Normal | Yes | Yes (slowly, if hunger is very high) | Hunger depletes, low health stops regen | Medium | Standard difficulty, good for most players. |
| Hard | Yes | No regen at low health | Hunger depletes faster, can cause death | High | Experienced players seeking a challenge. |
Recommendation for Beginners: Choose Easy or Normal. Peaceful removes a core part of the Survival experience (dealing with monsters), but is an option if you find them too stressful initially.
5. Naming Your World: Giving Your Creation an Identity
You’ll see a text box usually labeled “World Name”. Click in this box and type whatever you want to call your world! This helps you identify it later if you create multiple worlds. Something simple like “My First World” is perfectly fine.
6. Essential World Options for Beginners:
You’ll likely see several other options. Here are the most important ones for a new player:
- World Seed:
- What is it? A code (text or numbers) that generates the specific layout of your world. If two people use the same seed, they get the same world landscape.
- Should you change it? No. For your first world, leave this blank. The game will generate a random, unique world for you.
- Bonus Chest:
- What is it? An option to spawn a chest near you when you start, filled with basic tools and resources (like wood, stone tools, food). It’s surrounded by torches.
- A helpful start? Yes! For your very first time, turning the Bonus Chest ON is highly recommended. It gives you a nice head start.
- Allow Cheats:
- What is it? Enables special text commands (“cheats”) that let you change game mode, give yourself items, teleport, etc. Disables achievements/advancements if turned on.
- Yes or No? No. For a standard survival experience, leave Allow Cheats OFF.
7. Advanced World Options (Brief Overview)
You might see other options like “World Type” (Default, Superflat, Large Biomes) or toggles for “Generate Structures” (Villages, Temples etc.).
Recommendation for Beginners: Leave all these advanced options at their default settings for your first playthrough.
8. Ready to Go: Clicking ‘Create New World’ and Loading In
Once you’ve chosen your Game Mode, Difficulty, Name, and checked the Bonus Chest option, find the main button at the bottom of the screen, likely labeled “Create New World” or simply “Create”. Click it!
You’ll see a loading screen with tips or images. This might take a few seconds to a minute depending on your device, as the game generates your unique world.
9. Welcome! Your First View and Basic Controls
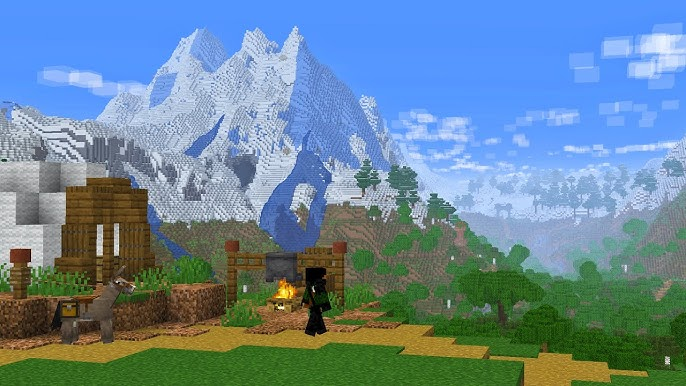
Suddenly, you’ll appear in your world! Take a moment to look around. You might be in a forest, a plains, near water – it’s random! Now, let’s move:
- Move: Use the W, A, S, D keys on your keyboard (W=forward, A=left, S=backward, D=right) or the Left Stick on a controller.
- Jump: Press the Spacebar (PC) or the designated jump button on your controller (often A, X, or South button).
- Sneak/Crouch: Hold the Left Shift key (PC) or press the sneak button (often Right Stick press or B/Circle). Sneaking makes you move slower, prevents you from falling off edges, and hides your name tag in multiplayer.
(Need more control help? Check the Minecraft Wiki Controls page: https://minecraft.wiki/w/Controls)
10. Looking Around: Controlling Your Viewpoint
- PC: Move your mouse to look around.
- Console/Controller: Use the Right Stick to look around.
Get comfortable with moving and looking simultaneously.
11. Interacting with the World: Breaking and Placing Blocks
This is fundamental to Minecraft!
- Breaking Blocks: Aim your crosshair (+) at a block nearby. Press and hold the Left Mouse Button (PC) or the Right Trigger (Controller). You’ll see cracks appear, and then the block will break, dropping a smaller version of itself you can pick up by walking over it. Different blocks take different amounts of time to break.
- Placing Blocks / Using Items: Select an item in your Hotbar (see below). Aim where you want to place it (on the side of another block). Right-click (PC) or press the Left Trigger (Controller). The block will be placed, or the item will be used (like eating food).
12. Understanding Your Screen: The Heads-Up Display (HUD)
Look at the edges of your screen. You’ll see important information:
- Hearts (Health): A row of hearts, usually at the bottom left. If these run out (from monster attacks, falling, drowning, etc.), you die!
- Hunger Icons (Drumsticks): Usually at the bottom right. This bar depletes over time, faster if you sprint or jump. If it gets low, you stop regenerating health. If it runs out completely, you’ll start losing health (on Normal/Hard difficulty). Eat food to refill it!
- Hotbar: A row of 9 slots at the bottom center. This holds items you can quickly access (use keys 1-9 on PC or directional buttons/bumpers on controller to select).
- Experience Bar: A bar above the hotbar (initially empty). Fills up as you defeat monsters, mine certain ores, or smelt items. Used for enchanting later on.
- Crosshair: The small ‘+’ in the center of your screen, showing where you are aiming.
13. Your Inventory: Accessing and Managing Items
Press the ‘E’ key (PC default) or the inventory button on your controller (often Y or Triangle) to open your full inventory screen. Here you see:
- Your character and armor slots.
- A 2×2 Crafting Grid (for very basic recipes).
- Your main inventory storage space.
- Your Hotbar slots reflected at the bottom.
Click and drag items to move them around. Press the inventory key again to close it.
14. First Task: Gathering Wood (Punching Trees!)
Your absolute first goal: get wood!
- Find a tree.
- Aim your crosshair at the tree trunk (the wood part, not the leaves).
- Press and hold the break button (Left Mouse / Right Trigger).
- The block will break and drop a small log item. Walk over it to pick it up.
- Repeat! Get at least 5-10 logs.
15. Basic Crafting: Turning Logs into Planks in Your Inventory
Wood logs aren’t very useful on their own. You need to turn them into planks:
- Open your Inventory (E key / Button).
- Pick up a log item (left-click on PC).
- Place it into any slot of the 2×2 Crafting Grid.
- Wooden Planks will appear in the result box to the right.
- Click the Planks to craft them (Shift+Click on PC crafts the maximum possible). Each log makes 4 planks.
- Drag the planks into your main inventory area.
16. Expanding Your Crafting: Making and Using a Crafting Table
The 2×2 grid is limiting. You need a Crafting Table for most recipes:
- Open your Inventory.
- Place one Wooden Plank into each of the four slots in the 2×2 Crafting Grid (total 4 planks).
- A Crafting Table item will appear in the result box. Craft it.
- Drag the Crafting Table to your Hotbar.
- Close the Inventory. Select the Crafting Table in your Hotbar.
- Aim at the ground nearby and place it (Right Click / Left Trigger).
- Now, aim at the placed Crafting Table and use it (Right Click / Left Trigger). This opens a larger 3×3 Crafting Grid, unlocking many more recipes!
Video: Making a Crafting Table (Example – Search YouTube for “Minecraft Beginner Crafting Table Tutorial”)
- Suggestion: Embed a short, clear video showing how to craft and place a crafting table. HTML
<iframe width="560" height="315" src="https://www.youtube.com/embed/VIDEO_ID" title="YouTube video player" frameborder="0" allow="accelerometer; autoplay; clipboard-write; encrypted-media; gyroscope; picture-in-picture" allowfullscreen></iframe>
17. Gearing Up: Crafting Your First Wooden Tools
Tools make gathering much faster! Use your Crafting Table (3×3 grid):
Essential First Tools Checklist:
- ✅ Sticks: Place 2 Wooden Planks vertically (one above the other) in the crafting grid = 4 Sticks. Make several.
- ✅ Wooden Pickaxe: Place 3 Wooden Planks across the top row, and 2 Sticks vertically in the middle column below them. (Needed to mine stone!)
- ✅ Wooden Axe: Arrange Planks and Sticks in an ‘L’ or ‘7’ shape (e.g., 2×2 planks top left, sticks below). (Faster wood chopping).
- (Optional but Recommended) Wooden Shovel: 1 Plank top-center, 2 Sticks below. (Faster dirt/sand digging).
- (Optional but Recommended) Wooden Sword: 1 Plank top-center, 1 Stick directly below it. (For defense).
Remember to drag your new tools to your Hotbar! Use the right tool for the job (Axe on wood, Pickaxe on stone, Shovel on dirt).
18. Uh Oh, Sundown! Preparing for Your First Night
A Minecraft day lasts about 10 minutes in real-time. Watch the sun move across the sky! When it starts to set, you need to prepare for the night, because Hostile Mobs (monsters) spawn in darkness!
Key Goals Before Nightfall:
- Gather enough wood (you already did this!).
- Craft basic wooden tools (especially a Pickaxe).
- Find or build a basic shelter.
- Create a light source (Torches).
19. Basic Shelter and Light: Surviving the Darkness
You need a safe place to hide from monsters:
- Quickest Shelter: Find a hill or cliffside and use your hands or a shovel/pickaxe to dig a small cave (e.g., 3 blocks deep, 2 high, 1 wide). You can block the entrance with dirt blocks you dug out (place them).
- Simple Hut: If you have enough wood planks, quickly build a small 4×4 or 5×5 box, at least 2 blocks high, with a roof. Don’t forget to craft a Door (6 planks in a 2×3 rectangle) so you can get in and out!
- Light is Crucial: Monsters don’t spawn in well-lit areas. Craft Torches:
- Find Coal Ore (stone block with black spots, usually found in surface stone or shallow caves). Mine it with your Wooden Pickaxe to get Coal.
- Place Coal above a Stick in your crafting grid = 4 Torches.
- No Coal? Make a Furnace (8 Cobblestone blocks arranged in a square with the center empty in the Crafting Table). Place the Furnace. Use it (Right Click / LT). Put wood Logs in the top slot (input) and wood Planks in the bottom slot (fuel). This makes Charcoal, which works just like Coal for torches!
- Place torches inside your shelter!
20. What Happens at Night? Understanding Hostile Mobs
When light levels drop outside, monsters appear:
- Zombies: Slow, moan, attack up close. Burn in sunlight.
- Skeletons: Shoot arrows from a distance. Burn in sunlight.
- Creepers: Silent green creatures. Get close, hiss, then explode, destroying blocks and hurting you! Beware! Do not burn in sunlight.
- Spiders: Can climb walls. Hostile at night, neutral in daylight (unless attacked).
Stay inside your lit shelter until sunrise! You can peek out a window (break one block) or listen for mob sounds to fade as morning arrives.
21. Beyond Day One: Next Steps
Congratulations, you survived your first night! Now what?
- Gather Cobblestone: Use your Wooden Pickaxe to mine Stone blocks (breaks into Cobblestone).
- Make Stone Tools: Craft Stone versions of your Pickaxe, Axe, Shovel, Sword using Cobblestone instead of Planks. They last longer and work faster!
- Craft a Furnace: If you didn’t already, make one (8 Cobblestone).
- Find Food: Kill animals (cows, pigs, sheep, chickens) for raw meat. Cook the raw meat in the Furnace (use coal, charcoal, or planks as fuel) to make it safe and restore more hunger.
- Find Coal: Essential for torches and fuel. Look in caves or exposed stone cliffsides.
- Explore (Carefully!): Start mapping out the area around your base. Look for caves, villages, or interesting biomes.
Video: Surviving Your First Night (Example – Search YouTube for “Minecraft First Night Survival Guide”)
- Suggestion: Embed a clear tutorial showing shelter building, torch crafting, and surviving until morning. HTML
<iframe width="560" height="315" src="https://www.youtube.com/embed/VIDEO_ID" title="YouTube video player" frameborder="0" allow="accelerometer; autoplay; clipboard-write; encrypted-media; gyroscope; picture-in-picture" allowfullscreen></iframe>
22. Saving Your Progress: How Worlds are Saved
Good news! Minecraft usually saves your world automatically and frequently.
- When you pause the game and choose “Save and Quit to Title”, it ensures everything is saved before you exit the world.
- On consoles and Bedrock edition, auto-saves are very common.
- You generally don’t need to worry about manually saving constantly.
23. Conclusion: Your Adventure Awaits!
You’ve done it! You created a world, gathered resources, crafted tools, built a shelter, and survived your first night. This is just the beginning. Minecraft offers endless possibilities – mining deep underground, exploring oceans, building huge castles, mastering Redstone contraptions, trading with villagers, traveling to other dimensions like the Nether and The End… the world is truly yours to discover and shape.
Don’t be afraid to experiment, explore, and look things up if you get stuck (the Official Minecraft Wiki is your best friend!). Most importantly, have fun! Good luck on your Minecraft adventure!